The functionality is organized in modules (or mobile apps).
- Each user may be assigned to only one mobile module – e.g. the user can only access one app.
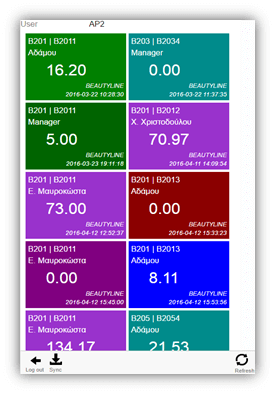
- Each module contains a set of tasks. The user will see the main screen after successful login.
- The app will try to find a predefined view with name Home which is rendered as a main screen.
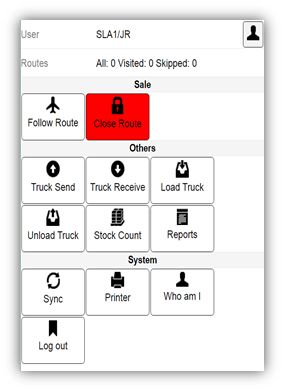
- The developer decides what needs to be displayed on the main screen of the mobile app. The actual module list depends on the user’s role. The user can click over the module name to activate the module and see the list of the module’s tasks.
Tasks
The user navigation workflow is defined as tasks. A task repents user activity and is a set of steps and screens which the mobile user will be presented on the mobile device screen. Every task has a name and unique identifier. The developer may display a single icon or button to the user and run the task after the user clicks over it.
From a developer perspective the task has :
- Unique name within the module
- Title visible by the device user
- Description visible to the developer
- A set of steps linked to each other with navigation routes
You can think about the task as a mini workflow having steps and navigation routes. The workflow starts with a single step. Each step can have multiple routes navigating to other steps.
Each step has a corresponding view. The view defines the actual user interface rendered to the user, when a given step is activated. The view contains code and the developer can navigate to other step by activating the navigation route by using the name of the route. This will cause the user interface to navigate to the next step and render the associated view on the screen.
Each route has a source step and target step. Some of the routes can have empty target step, which causes the task to end and the user is navigated to the main screen of the app.
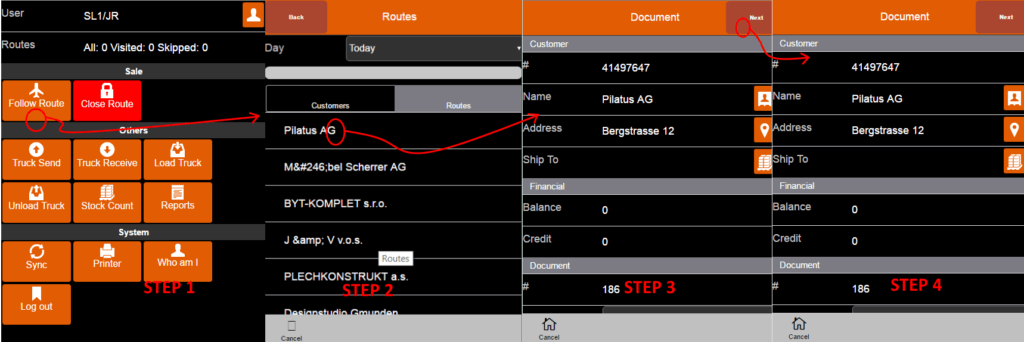
In this particular case the first step has a navigating route with name NEXT, which navigates(e.g. has target step) to the second step on the right. There are two standard buttons rendered on top of each view with titles Next and Back. The Back button automatically navigates to route with name prior. The Next button navigates to a route with name next. The developer can define the “prior” and “next” routes to navigate to other step or the developer can hide the buttons by calling:
$ma.uiManager.hideNextButton();//hides the 'next'

$ma.uiManager.hideBackButton();//hides the 'back' button

//The developer can navigate the user interface by using routes programatically

$ma.uiManager.navigate('next');//navigates by using a route called 'next'

$ma.uiManager.navigate('prior');//navigates by using a route called 'prior'

$ma.uiManager.navigate('otherroute');//navigates by using a route called 'otherroute'
The “navigate” method navigates the user interface to the next step where the given route points. The navigation process is complicated and performs internally many actions. See the description of the navigation process bellow in the View section.
View
The view defines the actual user interface in terms of buttons, icons,labels and others. Each step within the task has associated view. Actually the views can be re-used across the tasks and steps. So, if the developer wants to create a view allowing the user to select a customer from a list, he can then use this view in multiple tasks where a customer selection is required.
A typical view consists of layout definition and code.
The layout definition defines the graphical layout of the view. The layout is stored internally as xml-based format. However , MACloud Studio provides a view layout designer allowing the developer to easily build views. The developer can also use pure HTML5 to build more sophisticated UIs.
The developer can also write code to interact with the user and to manipulate the view’s layout or consume business data. The view has a lifecycle methods, invoked by the system during the navigation sequence. The developer can ‘override’ these methods to kick own logic during the navigation sequence. The following lifecycle methods are defined:
- dataModel() – it is invoked during the navigation sequence , just before the UI is rendered. Do not touch DOM elements within this method. It is invoked only once during the task lifecycle no matter how many times the view is been displayed.
- view_Load(completed) – It is invoked during the navigation sequence , before the UI is rendered and before the declarative data bindings are applied. You can manipulate the DOM elements here.
- view_Show(completed) – It is invoked during the navigation sequence , after the UI is rendered. You can manipulate the DOM elements here.
- view_Validate(completed) – Invoked during the navigation sequence if the navigating route is declared as ‘validating’. Check the user input here and return true if the input is valid. Return false if the input is invalid. Wrap your code in try/catch clause and display or log error message. not allow exceptions to go out of this method.
- view_Commit(completed) – Invoked during the navigation sequence if the navigating route is declared as ‘validating’ and if the view_Validate() method returns true. Persist your data here and return false if error occurs to abort the navigation sequence. Wrap your code in try/catch clause and display or log error message. not allow exceptions to go out of this method.
- view_Finally() – Invoked during the navigation sequence. This method is always invoked. is the ideal place to put the view’s clean up code.
NOTE: most of the functions,which build the view’s lifesycle provides a callback function parameter ( called completed ). It is required for the developer to call the completed() function after finishing the processing inside the function.
The navigation processes goes like this:
- the user starts a task by clicking the task icon
- the system generates an executable set of HTML,CSS ,images ,javascript and other resources – you can think for the task as a mini web-site. The layout for each view within the task is loaded into the DOM tree.
- the system determines the first step within the task and kicks out the the associated view’s rendering procedure only for this view.
- the view’s dataModel() method is invoked and the instance is assigned to the view’s _dataModel member. It can be accessed in other mehtods by using the self._dataModel expression
Use the dataModel() method to declare members and methods of the dataModel accessible via the self._dataModel expression and bindable via declarative expressions. - the view’s view_Load(completed) method is invoked. Place here your dataModel loading logic. Make sure to call the completed() function at the end.
- the view’s DOM goes to visible state and the view’s data-bind sequence is invoked
- the view’s view_Show(completed) method is invoked. Place here code to manipulate the DOM elements.Make sure to call the completed() function at the end.
- the view’s dataModel() method is invoked and the instance is assigned to the view’s _dataModel member. It can be accessed in other mehtods by using the self._dataModel expression
- the view is fully rendered and operational and the user can start interacting with the view
- the user can use the built-in Back/Next buttons to navigate to the next/previous step
- the user can tap buttons, links and other on-screen elements ,which in turn may fire the handlers attached to them.
- the developer can put navigation code in the handlers and navigate to other step by using named routes
- the user can click the Cancel button at the bottom to cancel the task and go back to the list of the tasks
- the UI navigates to next view
- the UI can navigatem, because the user has tapped the Back/Next buttons or other interactive element, which in turn has performed a call to $ma.uiManager.navigate method.
- the view’s view_Validate(completed) method is invoked. If the method fails to return true, the navigation sequence is aborted, and current view stays on the screen.Make sure to call the completed() function at the end.
- the view’s view_Commit(completed) method is invoked. If the method fails to return true, the navigation sequence is aborted, and current view stays on the screen.Make sure to call the completed() function at the end.
- the view’s view_Finally() method is invoked.
- the system determines the next step and it’s associated view
- current view’s DOM is transitioned to non visible state and the new view is displayed
- the new view’s dataModel() method is invoked ( if not invoked already )
- the new view’s view_Load() method is invoked
- the new view’s data-bind sequence is applied
- the new view’s view_Show() method is invoked
- the new view is now fully rendered on the screen
A typical view’s code looks like this:
dataModel:function(){

var me=this;// a little trick to save the reference to the dataModel function

this.customer = undefined; // declare a customer member due to verbosity reasons

//declare load method inside the dataModel of the view

this.load = function(completed){

try{

//fetch some customers from the mobile database

//and 'store' them into the dataModel's customers member

$ma.bo.SLA.Customer.fetchAll('','',100,function(customerRecords){

me.customers = customerRecords;

completed();});

}

catch(err){

$ma.device.error(err);

$ma.uiManager.alert('Ooops:'+err);

}

this.addCustomer=function(){

var customer = new $ma.bo.SLA.Customer();

cusomer.title = $('titleInput').val();

customer.city = $('cityInput').val();

customer.isNew = true;

this.customers.push(customer,function(){

$ma.uiManager.alert('customer was added');

});

};

this.validate=function(completed){

try{

//validate something

if(self._dataModel.customers.length==0){

$ma.uiManager.alert('Please enter at least on customer!');

return;//return false, to abort the navigation process

}

else{

completed();//continue the navigation process

}

}

catch(err){

$ma.device.error(err);

$ma.uiManager.alert('Ooops:'+err);

}

};

this.save = function(){

var linesToSave = [];

for(var i=0;i<self._dataModel.customers.length;i++){

if(self._dataModel.customers[i]isNew)

linesToSave.push(self._dataModel.customers[i].add()); //persist data

else

lienstoSave.push(self._dataModel.customers[i].update());//persist data

}

$.when.apply(linesToSave).done(completed).fail(function(err){$ma.uiManager.alert('Ooops:'+err);});

};

},

view_Load:function(completed){

//call the load func of the view's dataModel

self._dataModel.load(completed);

},

view_Validate:function(comleted){

self._dataModel.validate(completed);

},

view_Commit:function(completed){

self._dataModel.save(completed);

},

view_Finally:function(){

//finalization logic comes here

}
Code explanation:
- In this example the dataModel() method defines the data model used by this view. We’re using here a version of the popular Model View ViewModel (MVVM) pattern. Each view has own data model (a.k.a. view model ), which defines the data and the operations executed over the data.
- Developers can use a special binding declarative syntax to “bind” the UI elements to the view’s data model – see bellow.
- The view model in this case is declared in the dataModel() method. We declare a member called customers(e.g. data), and several ,methods(e.g. operations): load(),save(),validate(),addCustomer().
- We use then the dataModel operations to “plug-in” in the model into the view’s lifecycle. For example we call the load() method in the view’s view_Load() method, which will make sure that the view model’s data is populated on each view rendering: self._dataModel.load();
- We also call the view model validate() and save() methods in the view’s view_Validate() and view_Commit() methods to make sure that the model will be validated and persisted before the UI navigates to another step/view
General notes
- Wrap your code in try..catch block and log the errors by using $ma.device.error() method. Do not allow exceptions to creep out of your code
- Put your view’s data and operations in the the dataModel() and call them from the view’s lifecycle methods.
- The view’s dataModel() method is called only once during the task’s lifecycle, and will never be executed again even if the UI navigates back for second time over the view
- You can declare a load() method of dataModel() and call it in the view_Load() method to make sure the model is re-loaded when the view is rendered again on the screen.
- Use the reserved word self to access the view’s methods and properties
- The instance of the dataModel() function is assigned to a variable self._dataModel. You can access the members/methods of the view’s datamodel by calling self._dataModel.xxxx
Check out the Data binding section for more information about populating the visual elements with data from the view’s data model