The user interface in the Dynamics Mobile app are organized in tasks
Each task is represented in the mobile device as icon, which can be tapped by the user to launch the task. The tasks actually contains the user interface ( in terms of views/layouts ) and the code which will interact with the user. Every task can be considered as a small separate application(mini-website) running only the required resources.
Dynamics Mobile Studio provides features to make the development of new tasks easier.
Check out the Mobile API(JS)/User Interface section for more information about the tasks.
The developer can access the task designing functionality by using the Tasks link on the right from Dynamics Mobile Studio.
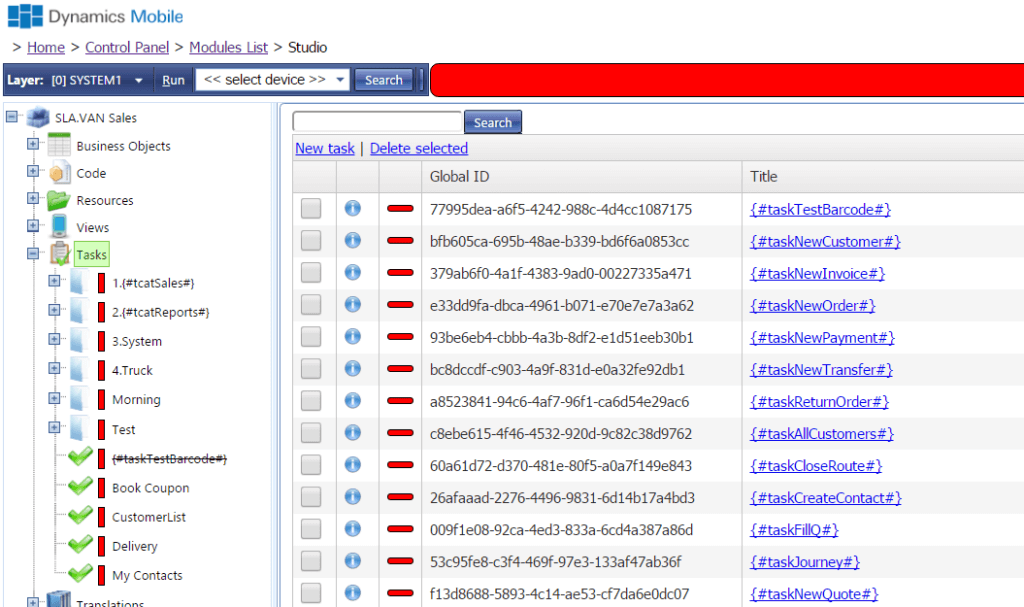
It will display the list of the tasks in the system. The list displays the following columns:
- Title – the title of the task visible in the device
- Category – category of the task is used to organize task in categories
The developer can perform the following tasks:
- Creating new new task by clicking the New task link on top
- Deleting existing task by checking the checkbox next to the task and clicking the Delete selected link on top
- Searching for a task by title and category by entering search pattern in the textbox on top and clicking the Search button
- Opening the task properties window by clicking the (i) icon next to the task
Creating new task
The developer can create new task by clicking over the New task link on top. It will open the New task window.
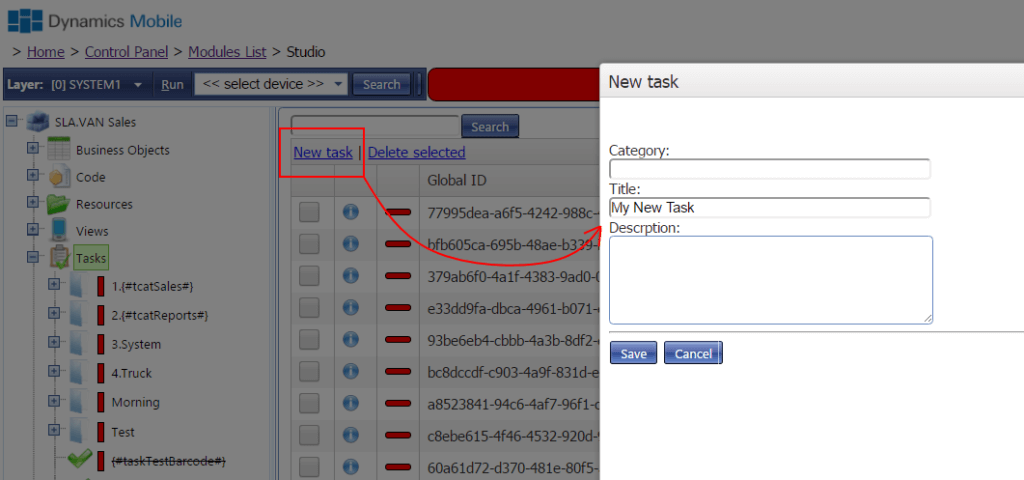
The developer has to enter the category ( not required ) and the title of the task and the description ( not required and visible only here ). The [Save] button will save the task and will open the Task editor page , so the developer can start editing the new task.
Note that the developer can use translated string identifiers in the Category and Title in order to take advantage of the automatic translation provided by Dynamics Mobile Studio. Check out the Studio/Working with translations section.
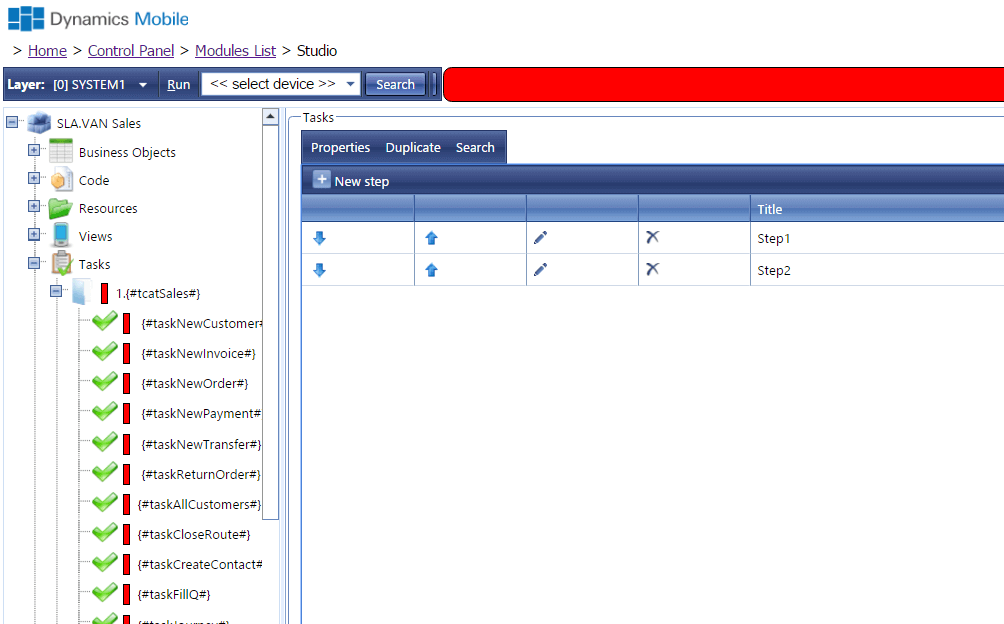
The task editor allows the developer to organize the steps and the navigation between them. The developer can perform the following actions:
- creating a new step by clicking the New step link on top
- opening a step for modification by clicking the [pencil] icon next to the view
- deleting existing step by clickign the [X] icon next
- re-order the steps by using the [up] and [down] arrows
Note that the first step in the list will be displayed, when the user starts the task.
The task editor uses a concepts for Steps and Routes to describe the user interface navigation. The task contains a set of steps. Each step can be linked to other steps (within the task only) through routes. Every step has:
- name – unique identifier across all steps within the task
associated view – view, selected from the list of the existing views , which will be displayed when - the step is activated( e.g. the user is navigated to this step)
- a set of navigation routes to other steps
The route is a concept describing the possible navigation from one to another step. Every route has:
- a name – unique identifier across the routes in a in a single step
- target step – describes the step, which will
- validating status – describes if the view’s validation logic must be invoked before the navigation happens. If the validation fails, the navigation will not happen.
The developer has to create a set of steps associated with existing views within the module and setup the navigation routes between them.
Every step should have two routes at least with names ‘next’ and ‘prior’.
Check out the Studio/Working with translations section for more information about the user interface.
Adding new step
The developer can create a new step by clicking the [New step] link on top. It will open the Task/Step editor to allow the developer to design the step.
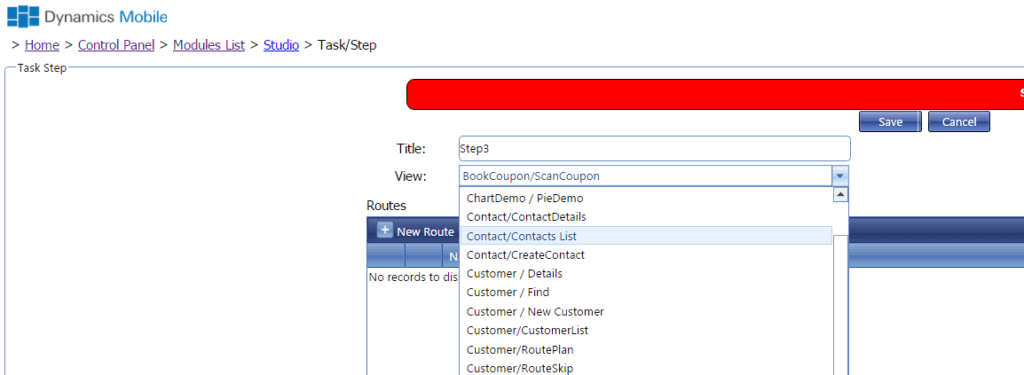
The developer has to enter the title of the step ( displayed on top of the device) and select a view ,which will appear on the screen when the user is navigated to the step.
The developer then has to specify the list of the routes, which can navigate to another steps. It is recommended to have at least two routes with names [next] and [prior].
The developer can :
- create a new route by clicking the New Route link
- delete existing route by clicking the [X] icon next to the route
- modifying existing route by clicking the [pencil] icon next to the route
The developer has to specify the following attributes for every route:
- the unique internal name of the route, which can be used to programatically navigate between the steps
- the target step of the route, which will be displayed if the route is navigated (selecting [end] will force the task to terminate when the route is navigated )
- the validating status: determines if the validation logic of the current view will be invoked in order to decide if the navigation will take place.
The developer can click the [Save] button to persist the step changes