Dynamics Mobile Studio allows the developer to design and code views.
The View (a.k.a. mobile screen) is a definition of the user interface including the visual components and the code behind, which handles the interaction with the user and the data.
Typically, the views are organized in Task and displayed sequentially to the user ( view by view ).
Check out the Mobile App Development/User Interface section for more information about the basic concepts behind the mobile user interface.
The developer can click the Views section on the left in Dynamics Mobile Studio to access the list of the views within the module.
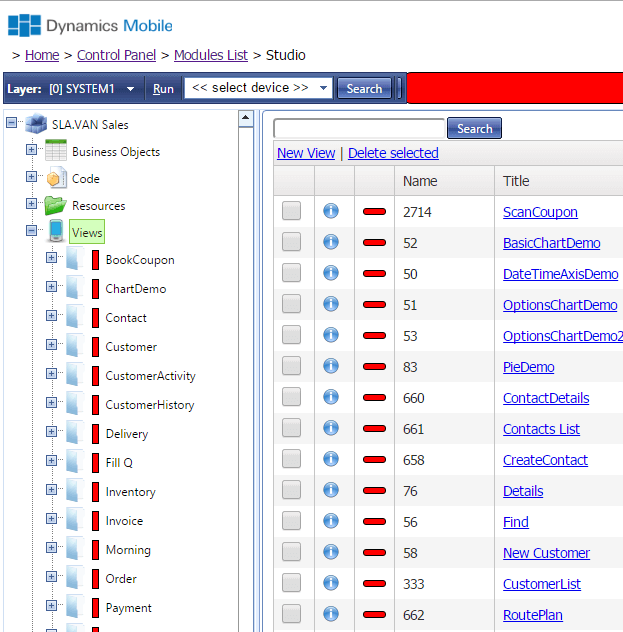
The list displays the list of the views available in the current module. The list displays the following important columns for each view:
- Name: the name of the view used as internal identifier across the other module’s components
- Category: the category of the view
The views are organized in categories. You can consider the categories as folder. You can organize the views used within a single task in one folder.
The developer can:
- Click the New View button on top to add new view
- Click over the view name to open it and modify it
- Check the checkbox next to the view and click the Delete button to delete the view
- Click over the tree-view on the left to open a view for modification
Creating new view
The developer can click the New View button on top to create a new view. The system will require the developer to enter the name and category of the view. The Save button should be clicked to persist the view.
The developer can then find the new view in the view’s list and click over the name to open it. It will navigate to the View designer page.
Designing the view layout
The View designer page allows the developer to design the layout of the view and to write code behind to handle the user interactions.
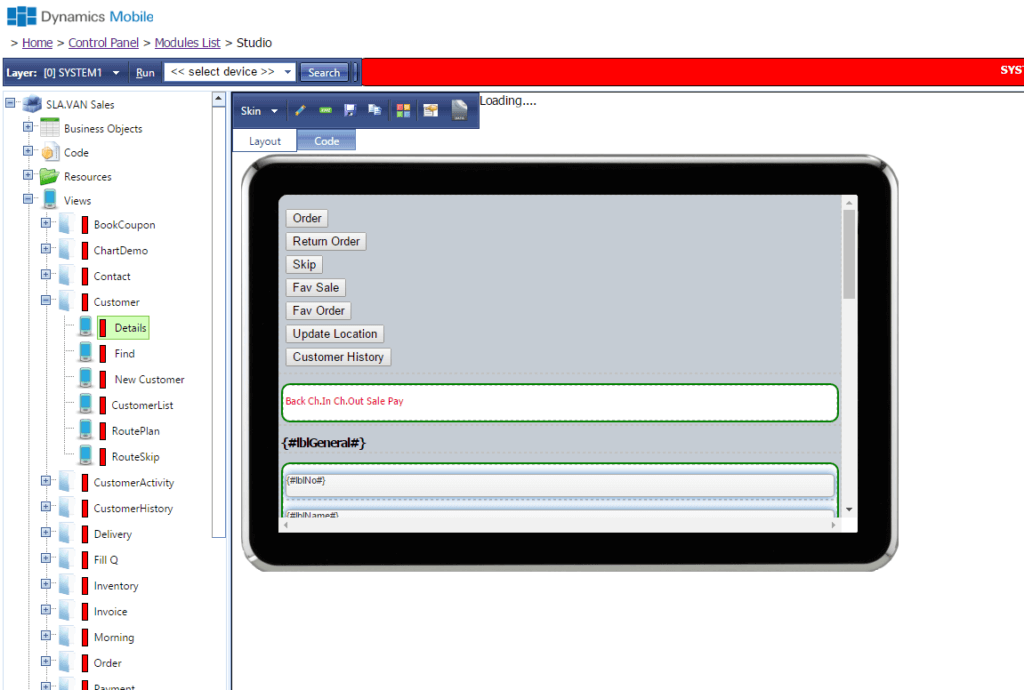
The developer can click over the view name to open the view designer.
It will display the view’s layout, first.
The developer can:
- Switch between Layout and Code modes by clicking the corresponding TABS at the top
- Change the skin of the designer to check the look on a phone, tablet and in full width and height
- Open the view properties window to rename or delete the view
- Save the view changes by clicking the [disk] icon on top
- Duplicate the view by clicking the [duplicate] icon on top
- Opening the control’s pallet to add new controls to the designer surface
- Opening the view’s design layout
- Moving the controls around the designer’s surface
- Opening the control’s properties by clicking over a control and clicking the [props] icon at the top-left
- Opening the view’s Data Model
Changing the designer skin
The developer can use the Skin button on top to select the visual style of the designer. The purpose of the feature is to allow the developer to preview the view layout on screen with a different size.
Note that when the skin is changed, the view’s layout is automatically saved and the selected skin will be remembered. Next time the view is open, it will automatically be displayed with skin selected during the previous development session.
Open the view’s properties
The [pencil] icon allows the developer to open the view’s properties window and be able to:
- rename the view
- change the view’s category
Saving the changes
The developer can save the view’s layout changes by clicking the [disk] icon
Dropping controls over the design surface
The developer can open the control toolbox by clicking the [toolbox] icon. It will open the toolbox , which contains a list of controls. The developer can drag the desired control with the mouse and drop it over the design surface.
Moving controls over the design surface
The developer can drag the controls over the designer surface to change their position. The controls can be dragged only by using the green handler on top of each control. Note that the designer surface actually allows the developer to design HTML layouts. The position of the controls is relative by default.
The developer can adjust the visual style of the controls including sizes, colors, fonts, float behavior and others by using the Style property of the control. The whole CSS arsenal can be used by the developer to achieve the desired results.
Changing control properties
The controls has a set properties ,which can be modified by using the control properties editor. The developer has to select the control and click the [properties] icon at the top-left to open the properties editor.
The properties editor will show the properties supported by the selected control The developer can change the properties to change the behavior and the look of the control.
Designing the view’s model
The developer can specify a set of properties attached to the view ( a.k.a. data model ) using a design tool. The data model design allows the developer to specify the properties in the data model, the properties population methods and others.
Writing code
Designing the view’s layout is only part of the work. The developer has to write code behind to handle the user interactions and system events occurred during the view’s life-cycle.
The developer can click over the CODE tab on top to switch to the code editor. The code editor only displays the code associated with the current view. It means that the code there is only executed in the context of the view either in response to user interactions (taps, swipes, etc. ) or/and system events.
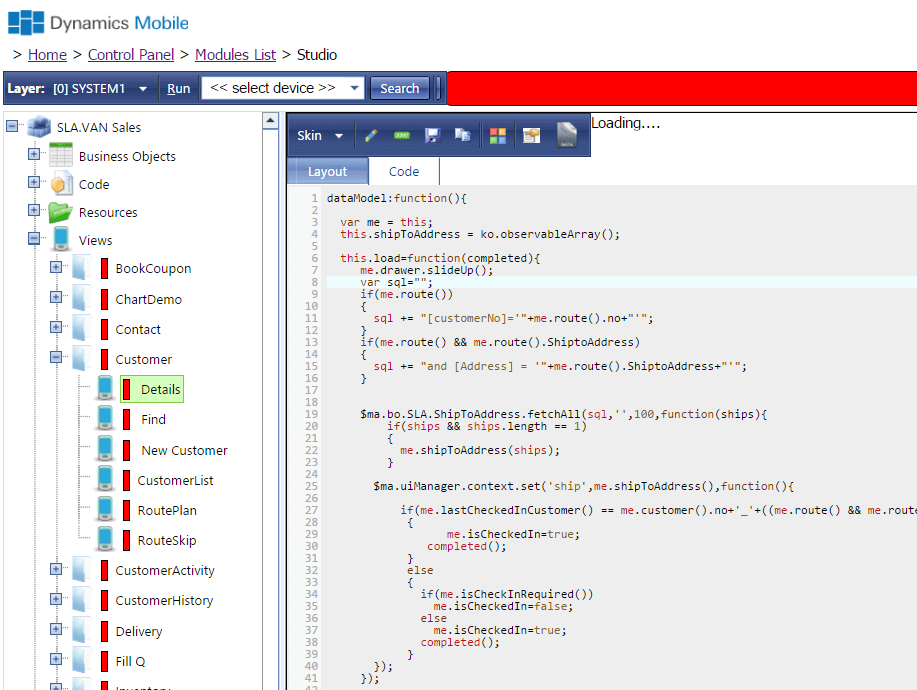
The developer can perform actions like:
- saving the code by clicking the [disk] icon on top
- writing code in the code editor
The code editor provides the following functionality:
- syntax highlighting – the code editor will highlight the code tokens with different colors to ease the code reading
- brackets matching highlighting – the developer can “step” with the cursor over a bracket to check if the bracket has matching one. It will be colored in red if the bracket do not match to another one or will be colored in green if the bracket number is right
- string searching within the code – the developer can press Ctrl+F to search for string within the code editor
- code completion – the developer can press Ctrl+[Space] to open the code completion tool, which will suggest a list of API functions and objects
Check out the Mobile App Development/User Interface section for more information about writing code
Also check the rest of the Mobile App Development/User Interface section